Adding a link to another webpage
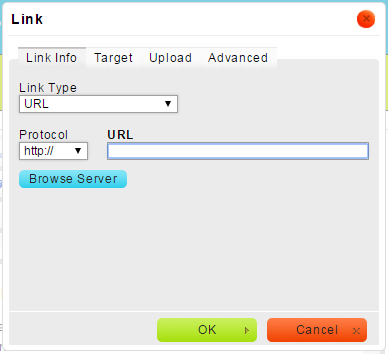
To create a link to another website or another page in your site, highlight the text you want to convert into a link and click the "Link" button.

Once clicked, a small pop-up Link options dialog window will appear. The fields for Link Type and Protocol should be left at their default settings, so you only have to type or paste the website address of the page you wish to share into the URL field.
Want your link to open in a new browser tab or window? Click on the Target tab in the Link options dialog window and select "New Window (_blank)" from the Target drop-down menu!
Adding links to files
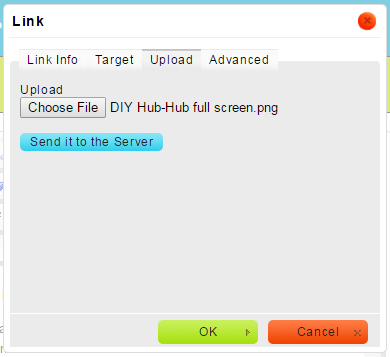
To insert a link to a file, such as a word document, spreadsheet or PDF, highlight the text that you want to convert into a link and click the "Link" button. When the Link options dialog window appears, click on the Upload tab and then use the Choose File button to browse on your computer to the file you wish to have linked on your website.
Once you have located that file, click the "Send it to the Server" button to upload the file. After the file has uploaded, click OK and your text will be linked to that file. When a visitor clicks on the link, they will be prompted to open or download the file, depending on the file type and their computer configuration.
Adding images
If you want to add an image to your page, simply place the cursor where you would like the image to appear, and click on the "Image" button.

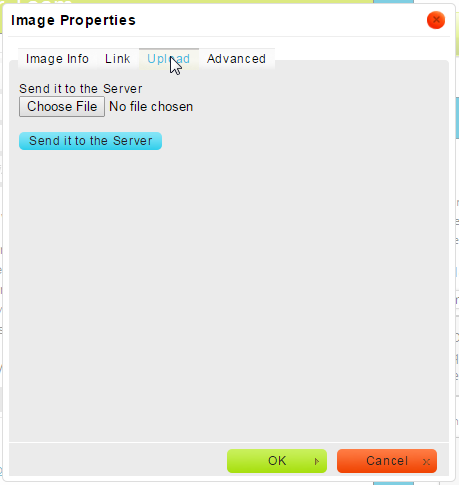
To upload a new image, click on the Upload tab and click Browse to search for the image you would like to upload. Once you have selected the image you would like to upload, click on Send it to the Server. Your new image will now appear in the Image Properties dialog box.
You may want to write alternative text that gives a very brief description of the image. This description will be provided to people with disabilities if they are using a screen reader to view your site.
Click OK to add the image to your page.
Moving images
You can drag your image to the desired location, right click on the image and select Image Properties to set its alignment, or use the built-in styles to move your image to the left or right side of the page.
Resizing images
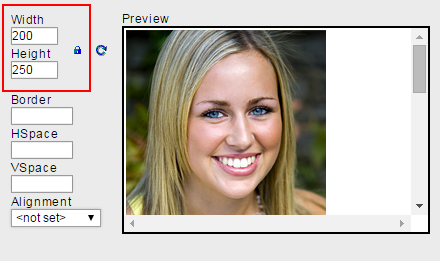
To resize an image, right-click on the image and select "Image Properties". You can adjust the height and width of the image using the fields provided. If the padlock icon is "locked" that indicates that the image proportions are locked, meaning that if you adjust the height, the width automatically adjusts to maintain proper proportions. You can click on that padlock icon to "unlock" the proportions if you need to adjust the height and width of your image individually.
Custom Image Styles
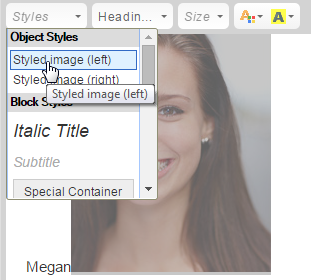
Your designer may provide you with custom styles to use in your website. If these styles are available, you will find them under the Styles drop-down menu. These styles will vary in both name and appearance, depending on how your designer has configured them.
If style options are available to you, you can apply them by selecting the image, and then clicking the Styles drop-down menu to choose the style option you desire. For example, "Image on Left" or "Image on Right" to move an image to the left or right side of the page.
Previewing your changes
Using the Preview feature allows you to see your changes exactly as they will appear after your page is published. The preview will open in a new window so that your changes will not be lost.
Publishing your changes
Clicking the "Save Page" publishes the updated webpage, making your changes immediately visible for all visitors to your site.
You may need to refresh your browser if you do not see the changes immediately. Windows users can use CTRL + R; Mac users can use CMD + R.
 Looking for more information? Check out these Related Pages!
Contact our Member Services team at 866-537-8272, Monday - Friday 6 AM to 4 PM Pacific Time.


